• Guest, Help The DPF Community Thrive - Join Our Donation Drive Today!

    We're launching a special DPF Donation Drive to ensure our beloved forum continues to flourish. Your support is vital in helping us cover essential server costs and keep our community running smoothly — This is more than just a donation; it's an investment in the future of our community.

    Join us in this crucial drive and let's ensure our forum remains a vibrant and dynamic place for everyone.

    Please visit the DPF Donation Drive Thread for details and instructions on how you can make your donation today!

RevtheRoadie's Pinboard Project Blog

Status
Not open for further replies.
RevtheRoadie's Pinboard Project Blog

RevtheRoadie

New DPF Member
Rating - 0%
0   0   0
Messages
40
Location
Indianapolis, In
Hello All,

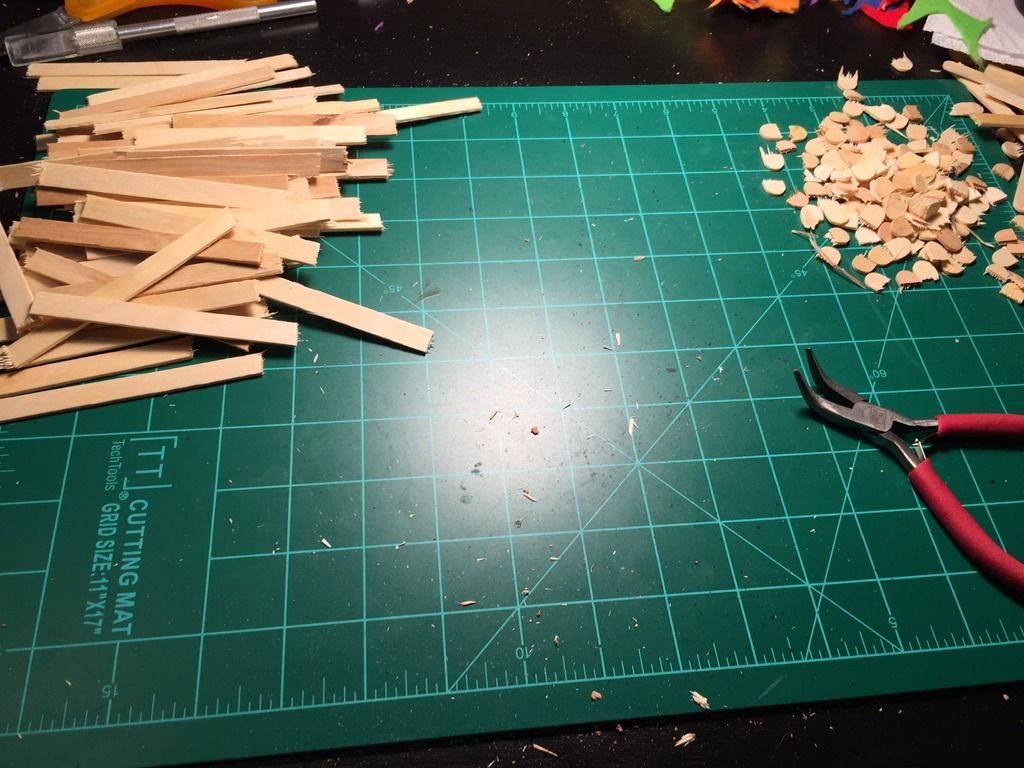
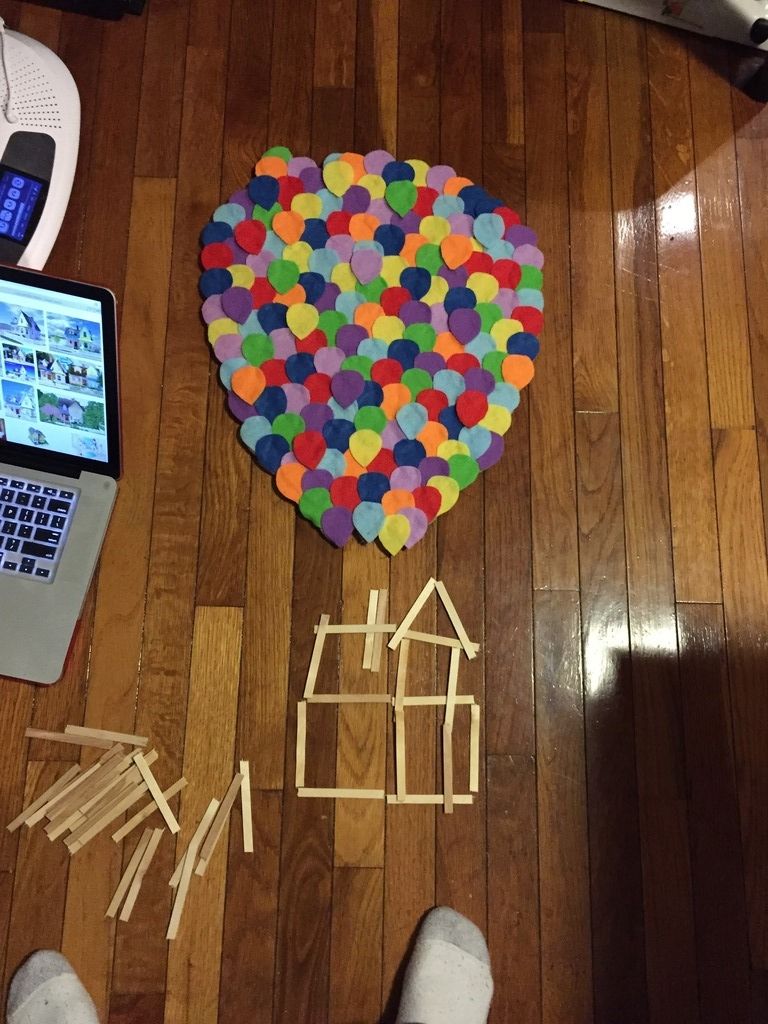
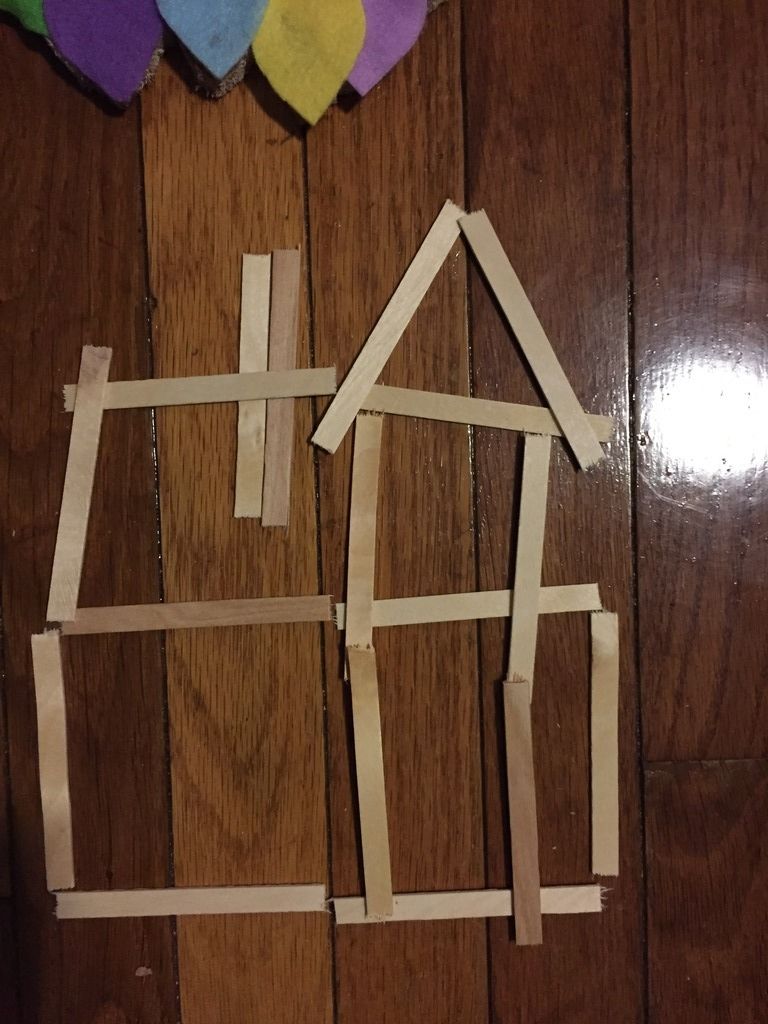
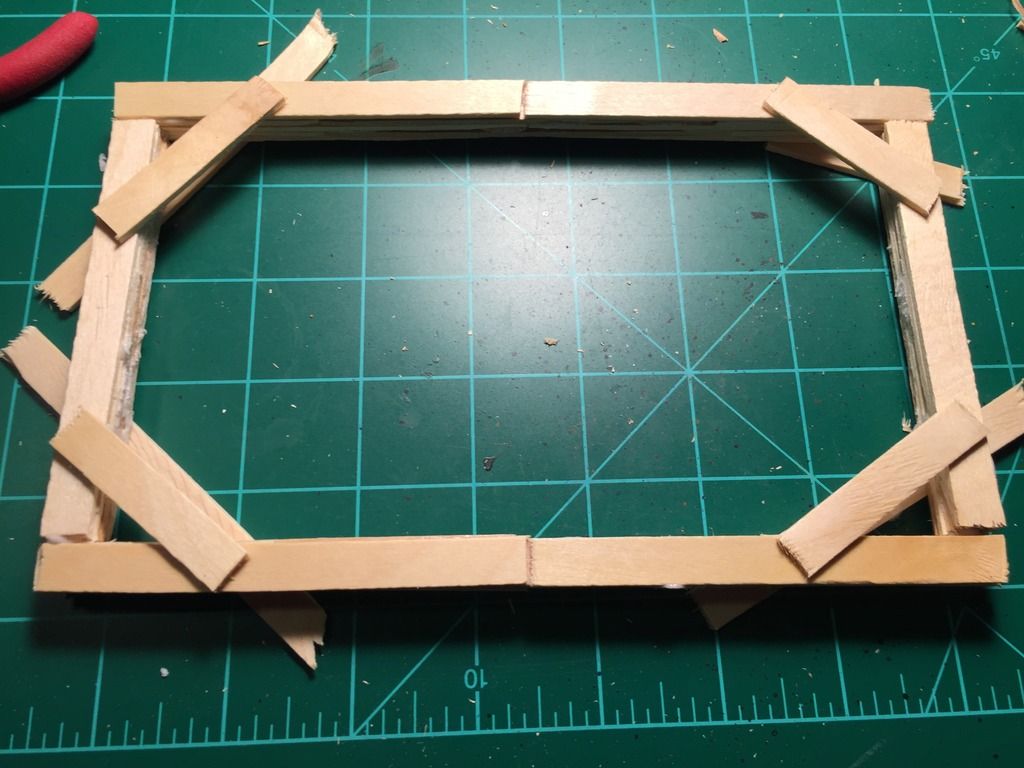
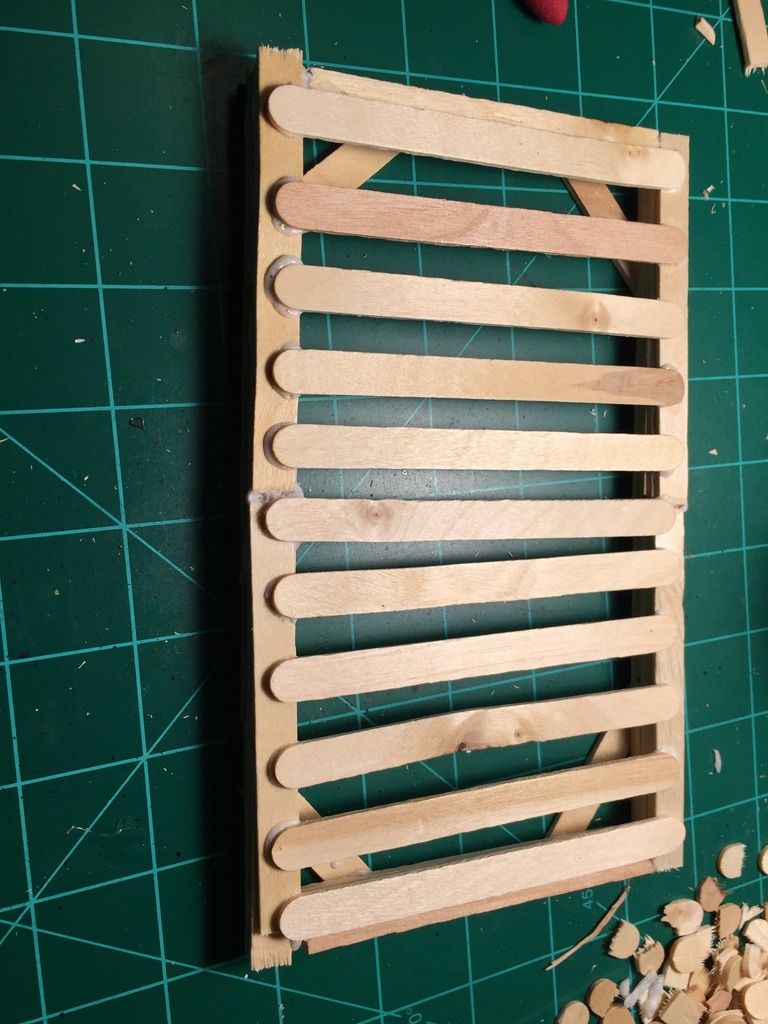
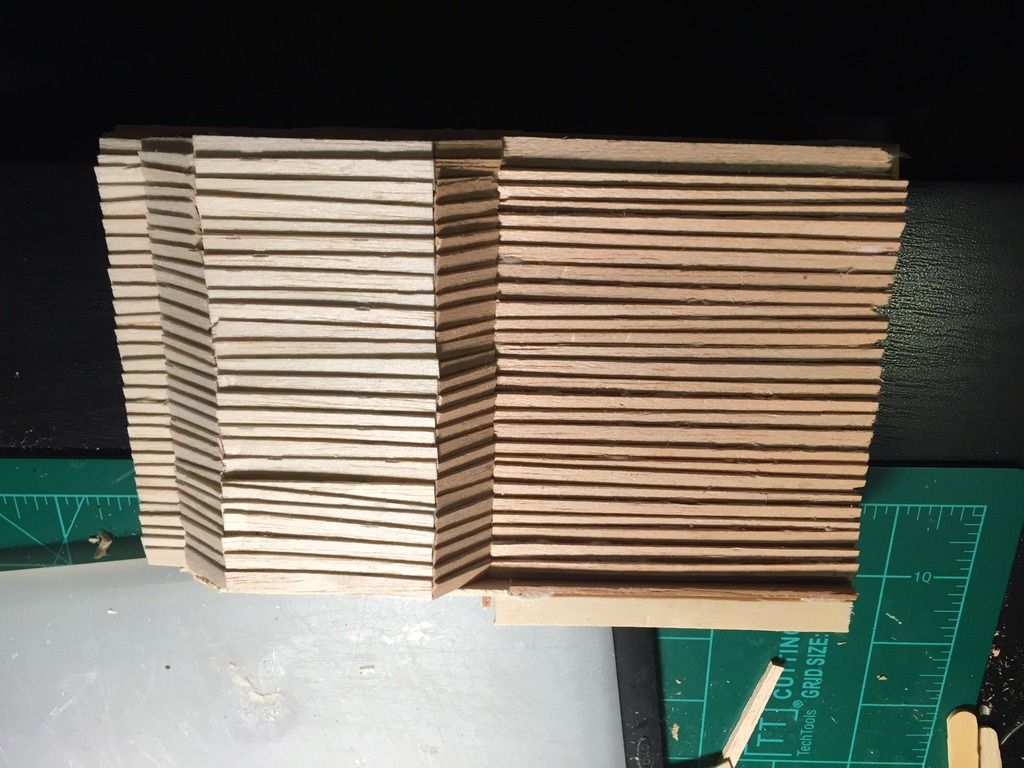
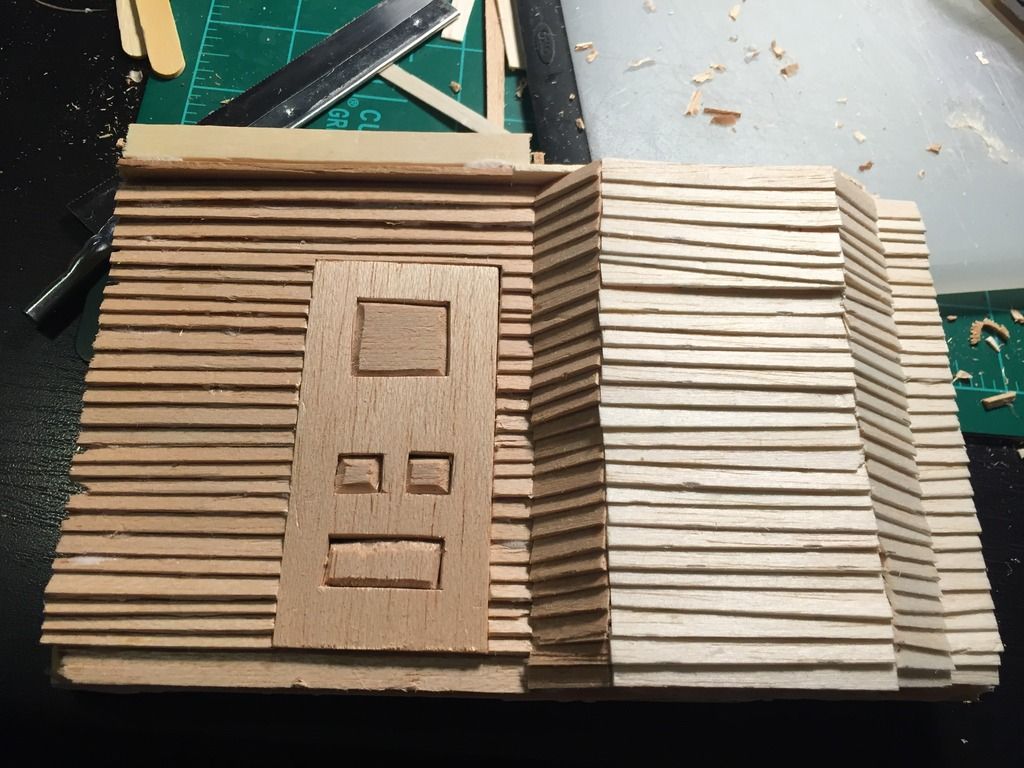
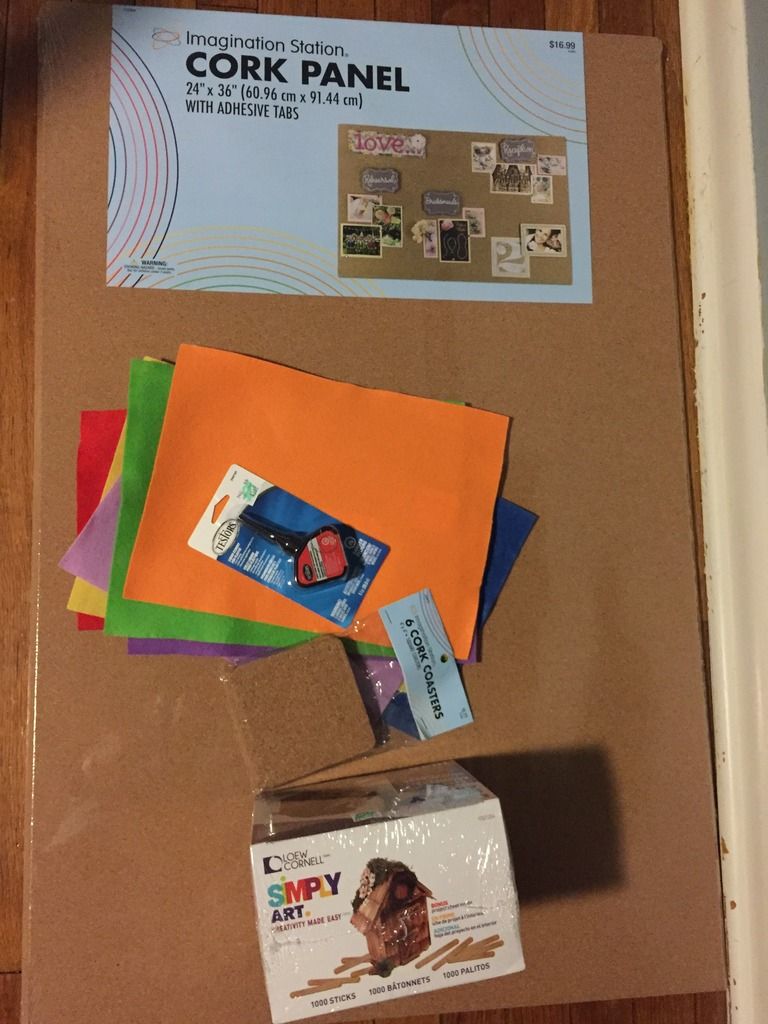
I'm new to pin collecting and after my recent WDW family vacation, I started thinking about ways to display my pins (why wouldn't I want to show them off). So I thought I'd make a themed board for my Up pins. I started this over on pin pics but thought I'd put it here as well. For this first post I'll just drop in the progress pics, but future posts will have more text.

625CEB69-21CA-443B-B4EE-C84B9D5160D1_zpsdfpskadu.jpg

F7E8A267-B152-4FE2-A896-3A9BF36BE9E9_zpsphdcayrz.jpg

79EF600D-80AD-490A-AAFD-C7956052FA89_zpsjsl9huno.jpg

74EB99A0-AE2F-4E2A-B0C4-DD66109C108A_zpsmduvjnpp.jpg

7C0DB002-729B-4493-AE02-2B296C464CC5_zpsy2i9s0d7.jpg


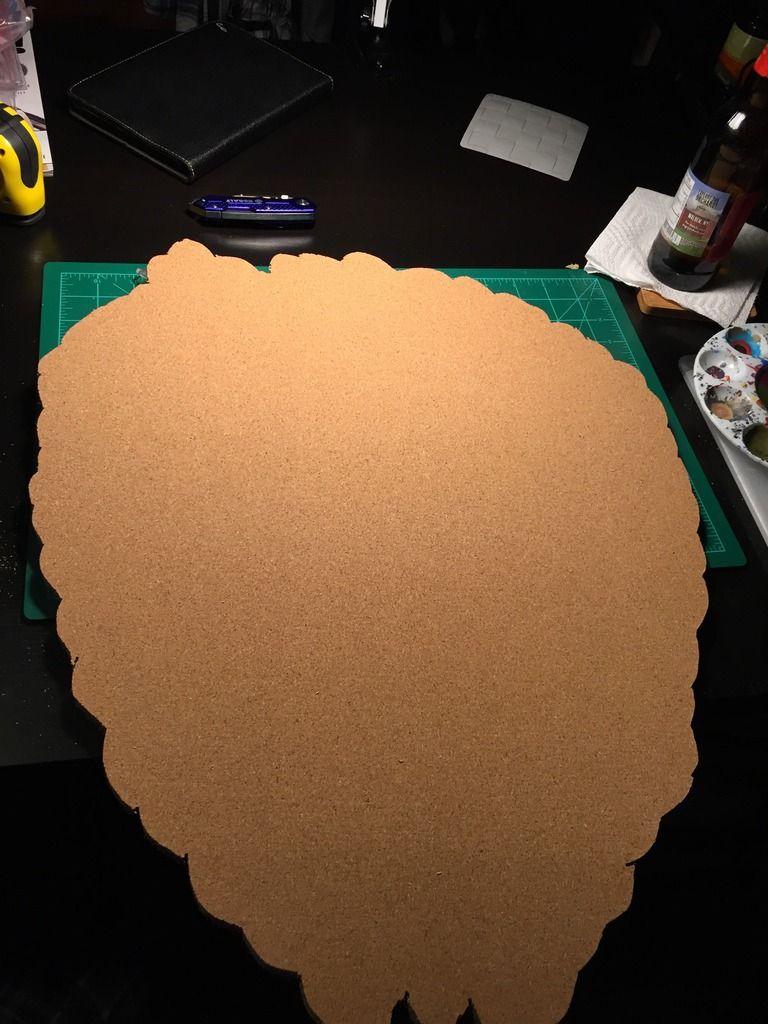
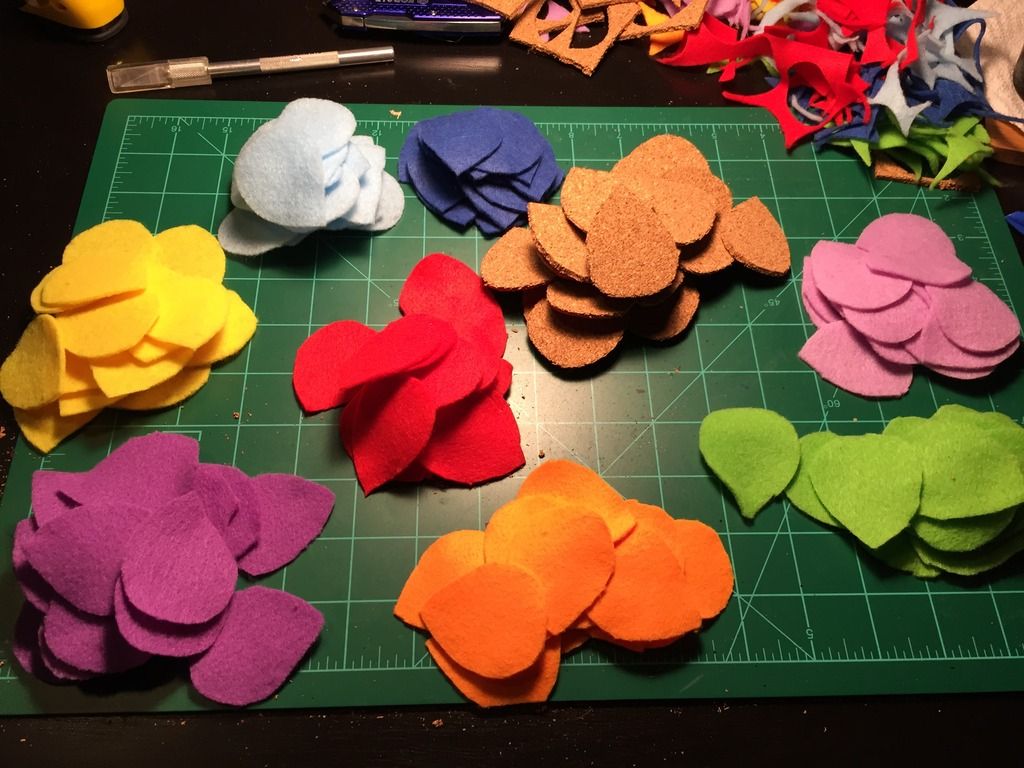
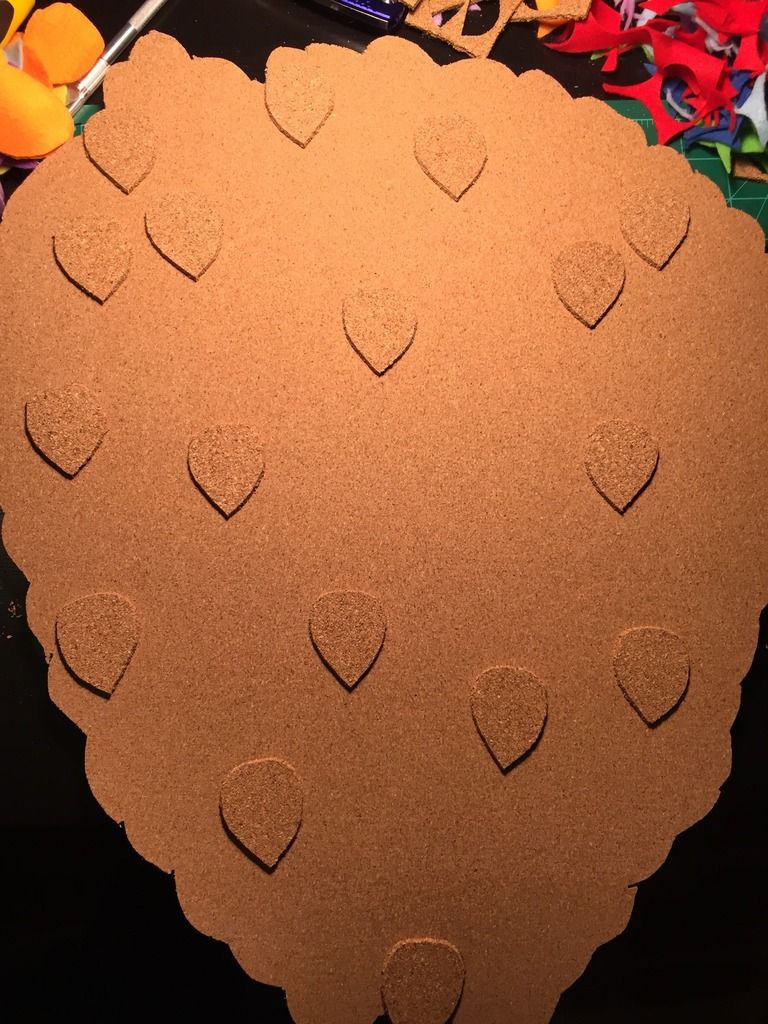
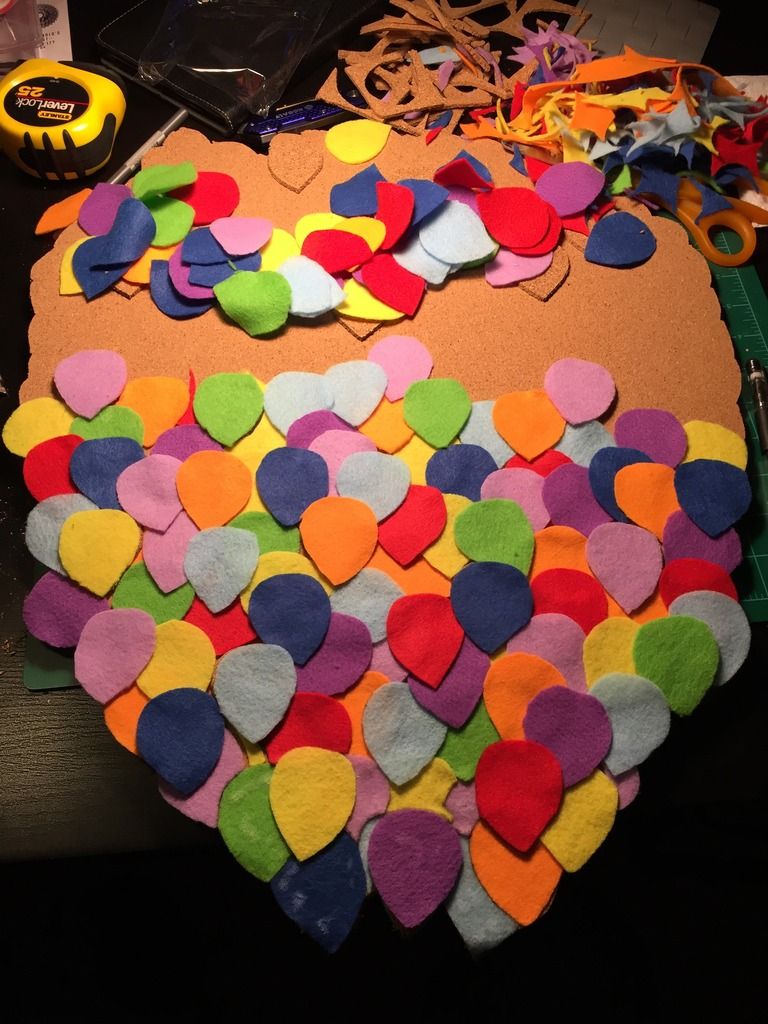
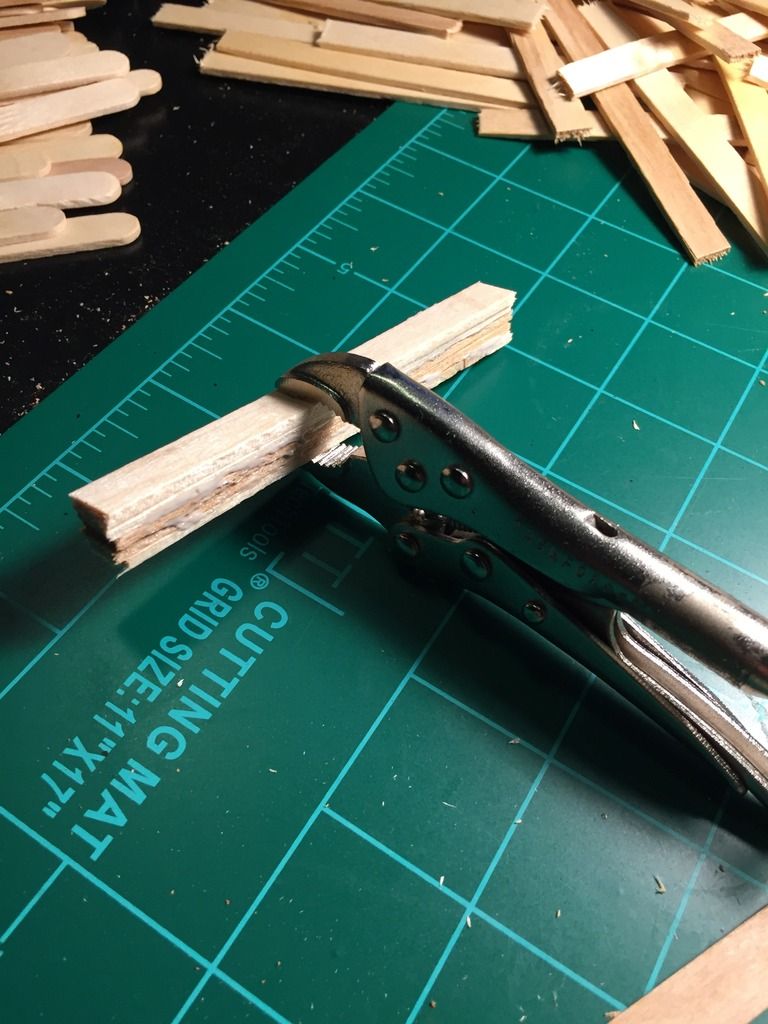
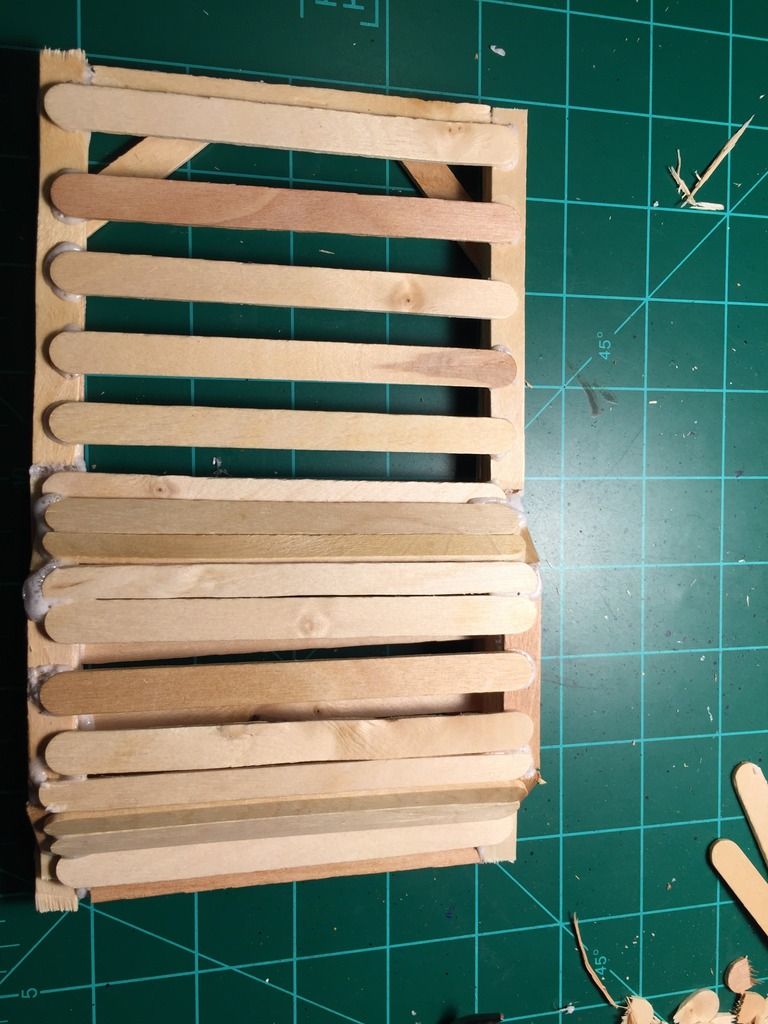
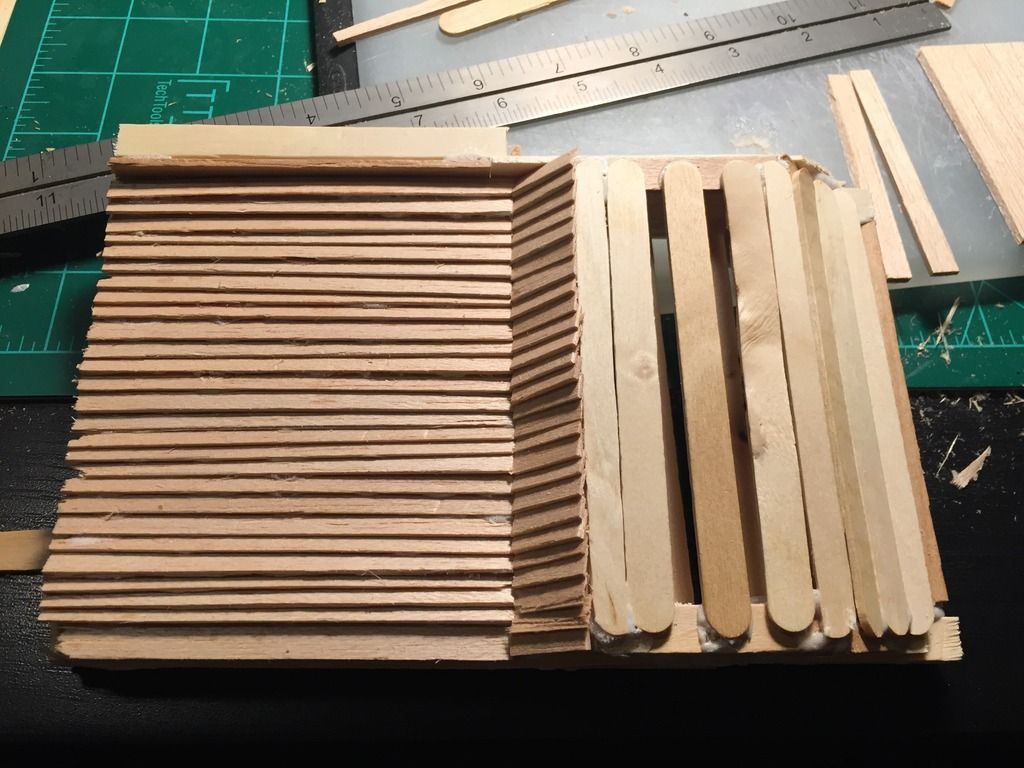
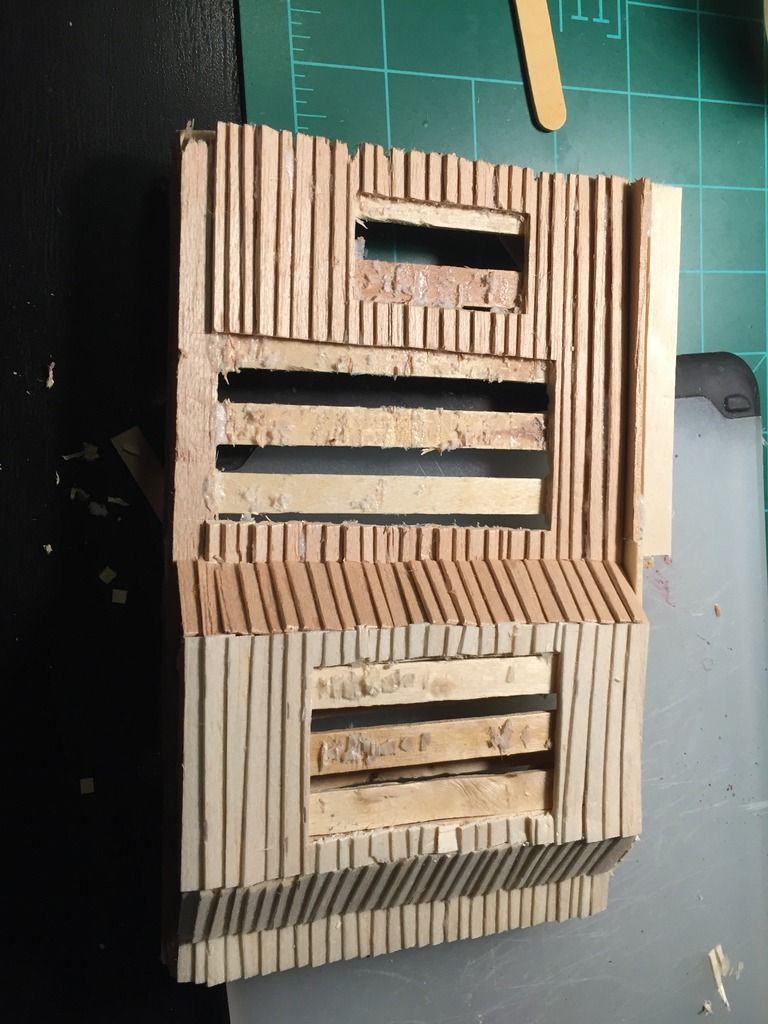
As you can see in the last photo I ran into some glue issues that will be resolved soon. Until then insights welcome and thanks for looking :)
 
What a great idea for a board! I went and read your posts on Pinpics, and am wondering what you are going to use for the house. Will it be felt covered cork, too? And how are you planning on attaching the whole thing to a wall?
 
Thanks everyone!

Lady Barclay- only the ballon part will be covered in felt. For the house I'm building it with Popsicle sticks and balsa wood. The cork board came with stuff to hang it on the wall with but I will probably attach stronger picture hanger hardware to the back when I hang it up.
 
Ballon stage complete!:dumbo:

1CACB716-548A-4326-83E3-6F51D1EF935B_zps0nnke2ng.jpg


I'm pleased with the pin board so far. This will be the spot that hosts all my up pins. Up next is Ellie and Carl's house. I'm really looking forward to building this part.
 
A little netflix, a whole lotta tea, and I've got an evenings worth of work to show for it. First off, I started trimming up the popcicle sticks. I know they sell the kind that have the ends squared off, but I can buy a large amount of the regular kind for cheap and it's easy to snip off the ends. Plus as a bouns I get extra piles of scrap to leave all over my desk for little detail pieces! Here's a picture of piles of stuff:

2552F34D-0DD8-45B6-9E84-206B68FBB602_zpschs9d3mz.jpg

Next, I wanted to try and get a little picture in my mind as to how large the house needs to be. I already decided to not go to scale from the movie. Could I? Sure, but I don't know that it would add much more than time and a small amount of bragging rights. So I spread out on the floor. You can see here this is just a very rough layout; little more than judging dimensions and future cuts to the popcicle sticks.
f31da526-2684-4892-bb24-f080fef047f6_zpssybiyrrx.jpg

And apparently we get a bonus shot of my feet.:facepalm:
The next photo was really taken for me as reference in case I need a close up shot of the layout. But I thought I'd share it anyways.
1b6f4d0e-faf2-4bd6-ab8f-066ebf836c32_zpsb2kbmqtx.jpg


Now with a better picture of sizing in my head, I began building up the frame to give me a place to build out from while establishing a beginning thickness. I decided to go five layers for the base. I think this will give me the best start to my dimensions, going out from the wall but not giving too much attention to the sides of the house, since I wasn't planning on doing much to the sides (though if I change my mind later, this should allow me to at least have a little space to work with if I decide to wrap the siding of the house around the sides as well) I headed out to the garage to grab a few clamps and it occured to me while out there that I really don't have the clamps I need for a project of this size. I did find one clamp in the tool box small enough and settled for the slow approach, doing a mixture of time in the clamp and under some heavy books. It's not perfect and meant more trimming after the glue dried, but I don't plan on living in the house and it will be covered anyways, so I guess it'll do.
7918B48B-9E67-48DE-82C9-960A3E2A516C_zpsuwb0dnli.jpg

After the glue was completely cured, I did some cleanup. I trimmed the edges of glue, warped bits/imperfections in the sticks, and the parts that shifted while I was clamping. Then I glued the frame together, adding some supports for the back, and went to bed.

63D0FA41-50AB-4F2B-BA4C-DD454D3EB9B7_zpshkgurtat.jpg

You can see some gaps developed. Tonight I'll fill the gaps and start adding the popcicle sticks to the front. I'm torn about whether to start adding the siding yet. I may try and run to the craft store and see if I can purchase a dollhouse door and windows to the correct size. I thought about building the house to fit purchased doors and windows, but decided against it in the end. If I have to make them myself it should only add a couple nights' worth work to the project. So that's where we stand right now. Thanks for the views and comments!:bigthumb:
 
Amazing progress, I'm loving this project so far! :D Also, what kind of socks are you wearing? They look super comfortable! ;P

Sent from my SAMSUNG-SM-J320A using Tapatalk
 
That awkward moment where your socks get more likes than your pinboard project :doh:

Haha I have no idea what brand they are. It's my wife who makes sure I stay clothed and relatively maintained. I guess I should be glad they weren't my fuzzy unicorn slippers.
 
That awkward moment where your socks get more likes than your pinboard project :doh:

Haha I have no idea what brand they are. It's my wife who makes sure I stay clothed and relatively maintained. I guess I should be glad they weren't my fuzzy unicorn slippers.
Fuzzy unicorn slippers?! They sound equally embarrassing and awesome lol. XD I'm excited to see how your house turns out, good luck! :)

Sent from my SAMSUNG-SM-J320A using Tapatalk
 
I'm fangirling hard over this pin display. What an awesome and creative idea! I don't want to jump the gun, but I'm curious, will the pins go into the felt? I wanted to make a pin display using felt but I was afraid it may not work out well.
 
Thanks all! Really feeling the love over here :hug:

Sunflower12- Yep, the felt part is where all the pins are going. Sticking the pins into the balloons for storage seemed quirky enough to make me happy. From the reading I did before starting this project, it really depends on how you want your pins to stay in. Others with more experience can weigh in here, but some prefer to have their pins held in place by the backing, while some (like myself) have the pin stick to cork board. My felt is more decorative than anything and relies on the cork board to keep everything in place. If you're planning a pinboard project of your own feel free to post your questions or comments here for community input or you can pm and I will try to point you to what resources I have found. Don't worry about trying it out. Felt is cheap and generous when it comes to mistakes. There are some pretty cool pinboard ideas out there, and I've already got two more boards queued up after this one. Making these things may get as addicting as the collecting the pins themselves :anxious:
 
Last edited:
This is so cool! I was planning a pin display project but nothing anywhere near this elaborate, just a cork board and some paint. :p The balloons look so freaking great.

I've been planning to ask this at some point but wasn't sure where--I've heard horror stories of people breaking their pin backs when they put them into or take them off of a board. Is there a certain kind of cork board that's better for pin displays than others, or is it all pretty much the same?
 
I'm probably the wrong person to ask. My guess is the better quality the cork board the less wear and tear on your pin backs. I did not spend as much as I could have on the board so what I have is a sort of particle board with a layer (a really thin layer) of cork over it. I would imagine that placing the pins in and taking them back out would eventually do a number. However, this board will not be housing any of my traders and once placed the pins should have no reason to be removed any time soon. When you look at cork boards you can really tell a difference between ones that are more cork and ones that have extra stuff to thicken the board. Just like pins you should be able to tell somewhat by handling the material.

I look forward to seeing your pin board when you begin the project. This has been part of the fun for me in joining this forum is seeing everyone's awesome collections.
 
Today's update has less to show, but took about the same amount of the time. To start off I attached popcicle sticks to give me something to build from for the doors, windows, siding etc.

C758F952-C04B-4927-AFF3-4233C87D4E1F_zpssgtfwwsn.jpg


You can see in this picture that I filled gaps where I thought I might need a good surface to attach to. I then started on the part that extends from the front of the house with the front window. This one had me puzzled about how to go forward, mostly because I had several options. Should I build it like an actual house and frame it out? Should I layer it out? How far out should I go? I finally decided to go with something that ended up looking like fence sections you buy at the Home Improvement stores. My thought was to do this sort of the like the prefab walls where I could build the walls then just attach them together and to the main part of the house. This was a fantastic mistake. I used up a good amount of time and materials building these and discovered at the end that attaching them would bring the front of the house much farther than I would like (Remember we're not going for scale here just for a three dimensional look). I also tried to save myself some time with a short cut while fashioning the pieces holding the walls together. I'll save you the details, but the short version is, knives are sharp and should not be used like a wedge to split the pieces. So this venture looked a little something like this:

[video=youtube;ZyideP8H08c]https://www.youtube.com/watch?v=ZyideP8H08c[/video]

Thankfully, no real injury. Just a little reminder to think about my cuts more carefully. For my second try, I went waaay simpler and did a smaller version of the main house. Really I don't know why I didn't think of that the first time, but hey challenges are what make hobbying fun. It's hard to see exactly what I did in the pictures but you can get the general idea.

90C0CBF6-A4BB-47AC-9390-7293CBA11138_zpss0wk3wc5.jpg


79B7ADE5-2413-431E-8F68-766FAA09F466_zpsrqnajlry.jpg


I won't have time today to go look at doors and windows, so tonight I may try and get a jump start on the top half of the house.
 
Rev - thanks for the thorough reply, I appreciate it! I'll have to give some more thought to using felt in my project. Silly question, but do you notice that when you stick pins in the felt and then remove them, there's a noticeable hole in the felt? That would bother me if I wanted to continuously rearrange the pins on the board.

And awesome progress! Can't wait to see more updates
 
You know I only tried it the once and didn't notice much of a hole. I'll do a test with some scraps and let you know what I find out. I've got an update in the works. The siding and such has been taking a while and doesn't make for very interesting updates. More to come when get further along
 
Update!

It's been a while since I have posted an update mostly because the work done wasn't all that interesting to look at. The first few pics are the progression of the siding. I thought I had purchased thinner stuff than I did (the bin was mislabeled) and because I felt that each of the pieces was too thick, I ended up cutting them to the correct size then sawed them in half. After doing this for most of a week, I happened to be in the hobby store with my family and saw the correct size (I thought I bought 1/32 thickness but it was actually 3/32). After buying a sheet of the right size things moved much quicker.

1D9C4FB4-9D6C-4323-AEEF-B066CFA3C7AA_zpsqwcwc3ns.jpg


4D8362E8-6DE9-4F67-AF63-E7277C80E5CF_zpshwvfe6vv.jpg


Here you can see the siding is all on. One thing to note, you'll notice some of the pieces are not on straight and look like they have come loose. I did this on purpose to break up the look. When finished it should look better with these minor "imperfections".

01D53F43-F7D3-4756-B234-EBC73BACF14D_zpsk1li0dng.jpg


In this photo you can see the door. Getting all the little pieces carved just right ended up being a little beyond my abilities. I'll settle for close on this one
smile.gif


4D4988D6-4365-4495-86BE-B90A085F47FB_zpscdymzkux.jpg

Here you can see everything cut out for the door and windows. For some reason I did not take a picture of just the constructed windows, but they aren't all that interesting sitting on the desk anyways. I made the judgement call to not put all the windows in. I really didn't want to extend the front of the house out too far and instead went the direction of embellishing the couple parts that have roles to play in the movie. So for this I went with a door and front window that is slightly larger than they should be. It'll make for a good place to draw the eye when finished.

I am further than this last photo shows. Last night I painted this section (it'll be easier to paint and then add over the top rather than try to reach into the hard to reach places when everything is assembled). Out of all the hiccups last night was the more frustrating one, though is an easy enough fix. I thought I had a good photo that I was working from for reference and picked up paint based on that photo. I painted the bottom section of the house and thought "wow I really don't like the look of that but maybe it'll be ok when it's all finished" I couldn't see the door very well to tint it to the right color so I pulled up the scene where Russell is introduced to get a better look at the door and discover the shades of the color aren't only off, they are the entirely wrong color.
mad.gif
That one is on me and I knew it. So I turned off the lamp and called it a night on hobby time. In the grand scheme of things its a minor fix that I can do this weekend, and only lost an evenings worth of work. Such is the hobby life...

Sunflower- I did a test on a scrap piece of felt and found that once I pulled a pin out of the felt, if a hole was left behind rubbing your finger over the hole a couple time smoked the felt back into place and filled the hole.
 
Last edited:
Status
Not open for further replies.
Back
Top