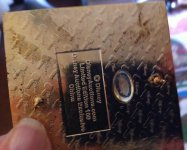
First off, let’s define what a scratch is versus a crater like the Grand Canyon. Normal wear on a pin or light scratches such as when they rub together can be polished out relatively easy.
What you have to understand is that we (you) will not only be polishing the scratch but the entire area around it. The idea is to bring the surface area around the scratch down to the relief level or depth of the scratch.
Some scratches or grooves are sometimes too deep to fix. You have to remember you are taking a small amount of surface area off. Now don’t panic, when you wax your car, each time you are removing some paint but in almost non-measurable amounts.
For the record, we are talking about hairline and minor scratches anywhere from a few 10,000th’s of an inch to a few 1000th’s. Of an inch.
NOTE:***** Some pins are not all enamel or Cloisonné’ and actually have screened images or print on them. A great example is the WDI Name Badges.
I have a friend who just used a cleaning solution and it wore the name off the pin.
You must know your pins prior to cleaning it with anything. As for cleaning, I usually recommend just a light cloth with like (Distilled or Filtered) warm water and if necessary a small amount of Dish soap as there are no chemicals that will have a reaction with the metal, enamel or print. “Don’t use Windex or other household chemicals”
Now to remove the scratches:
One of the best ways to remove the scratches is with a jeweler cloth embedded with rouge. This is used on all fine jewelry including gold and the finish when completed is like a mirror. This is more for the polishing end and will remove minor scratches but can take some time. Then again, any removing of scratches when done properly will take time.
You may have heard of people using toothpaste to remove scratches on a watch face. Toothpaste is abrasive but at a minimal abrasion rate. In many cases you can remove the scratches with toothpaste and the recommended cloth is cheesecloth. If you use a cloth that is rough (and it may seem smooth to the touch) it can hurt more than it helps.
If you don’t have cheesecloth, maybe you have a lens cleaner from a camera or glasses. These work very well as they have no abrasive elements.
*** Remember that you should use circular movement when polishing and polish the entire area around the scratch. You are basically bringing down the rest of the surface to the scratch. If the scratch is a little more than just a mark on the finish, you may need to remove more enamel.
You can buy polishing compound at any hardware store like Home depot and again, make sure you use the right type of polishing cloth. Once you are done with the polishing and the scratch is removed, you can wash the pin (again with Distilled or Filtered water) and then Wax it. Believe it or not, turtle wax works really well and will put the luster back into the pin.
In many cased, just a nice buff and wax can bring the pin back to its original form. It is always best to start with the least abrasive and work up as needed. If it will wax out, that is your best bet but I have had great success removing scratches from y pins as well as friend’s pins.
Someone asked me about rubbing compound and for starters, there are typically 2 types, fine & coarse. Never use coarse and try not to use it at all unless you are prepared to spend some serious time on the pin. When using rubbing compound, the particles are larger and will remove scratches but will require a lot more polishing and buffing to obtain a glass like surface. It does work but I recommend this for the more experienced users.
If you have any questions, you can always feel free to PM me anytime.
I hope you find this information useful as I have heard many people talk about scratches and how to remove them.
Last edited:


